
1) What is a R.A.T?
R.A.T is remote administration tool. In other words, if a RAT is set up correctly, then a person (hacker) would gain acces on victim's computer. That hacker can do any stuff in victim's pc.
For example: a)will be able to move his mouse and keyboards
b)will be able to see your victim by hacking his webcam and etc.
2) Which is the best RAT?
I dont use many RATs. The best that i ever used is Cybergate RAT
So now, lets get started.
First of all you guys download this:
Cybergate Download Link(click here to download)
this download link was not made by me.download and use it at your own risk
this application is called cybergate and it will used to create rat server.
this app might be detected as virus by some antivirus.but dont worry it is not backdoored.
download it and extract it to a folder.
==============================================================
Secondly set up the no-ip client
to do that you must go to :
NO-IP SITE(click here)
register there.
once you have logged in, you must "add a host"
Image has been scaled down 36% (758x329). Click this bar to view original image (1174x509). Click image to open in new window.

Now type in your name at hostname.and choose any domain. you dont have to follow the same name like in the picture below.

now you can see that you have successfully created a host.
now download the no-ip duc client that is available at that site.
Image has been scaled down 16% (758x273). Click this bar to view original image (902x324). Click image to open in new window.

click the windows version.
once done downloading, run the program. sign in using your no-ip username and password.
and press select host and you can see your host there. click at the box and press save .
===========================================================
now its time to set up your cybergate RAT seRVER
LETS CONTINUE
run the cybergate rat that you have extracted into a folder.
there will be agreement which you got to wait for a few seconds before agreeing.
next: Control center-->start
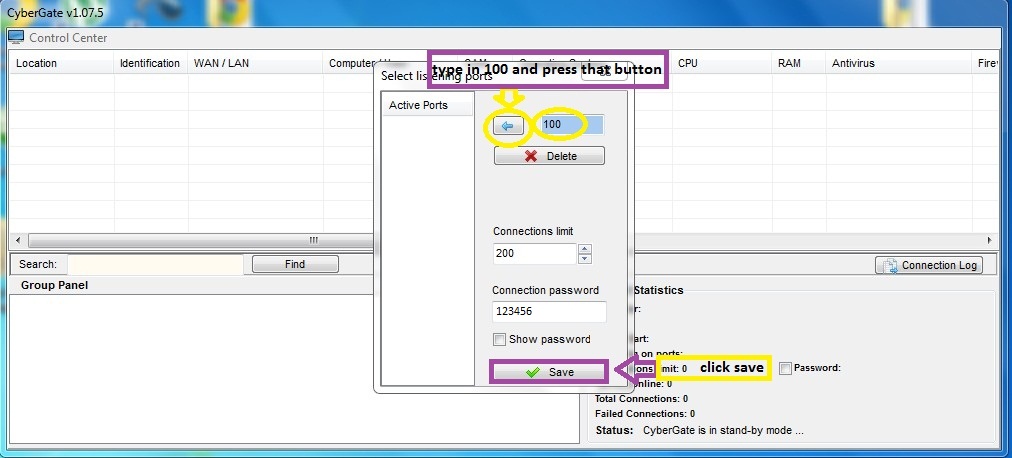
now a box would appear.you have type in 100 and press the go image button.
and type in the connection password as 123456
and click save
Image has been scaled down 26% (758x344). Click this bar to view original image (1012x458). Click image to open in new window.
now press: control center--->builder--->create server
Image has been scaled down 25% (758x345). Click this bar to view original image (1009x459). Click image to open in new window.

now a box would appear.
click new
press the name of the new user and ok
Image has been scaled down 25% (758x344). Click this bar to view original image (1009x457). Click image to open in new window.

now double click the new user.
Image has been scaled down 25% (758x342). Click this bar to view original image (1009x455). Click image to open in new window.

after that you will the connection tab.
view the picture for better understanding.
if you want to test the server on yourself or same lan networkk, then you have to edit the 127.0.0.1:999 to 127.0.0.1:100
if you want to test on others, then add:
yourhost.no-ip.info:100
Image has been scaled down 25% (758x346). Click this bar to view original image (1010x460). Click image to open in new window.

change the identification to cyber and password to 123456
Image has been scaled down 26% (758x344). Click this bar to view original image (1011x458). Click image to open in new window.

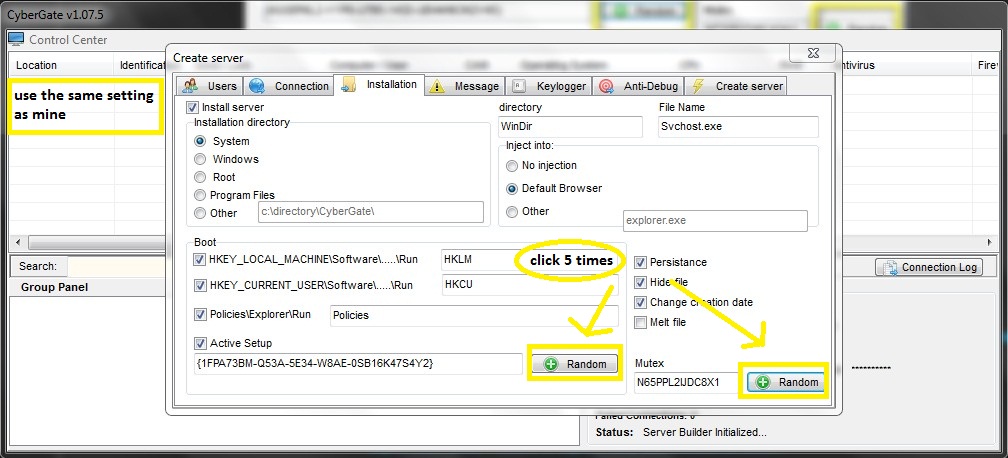
now press the installation tab and use the same setting as mine.
Install directory is the where the server installs
%System%
%Windows%
%Root%
%Program Files%
%Other%
it is more better to use "system"
Boot: this will be the startup option. check everything and press random 5 times so that the server will start everytime your victim start the computer
Directory is the place where the server will be situated
File Name will be the name of the server in the directory
change the creation date
persistence will inject the server into the victim,s pc until success
for inject into just use default browser
dont choose hide file because it will make your server detectable by all antivirus
Image has been scaled down 25% (758x345). Click this bar to view original image (1008x458). Click image to open in new window.
go to anti debug tab and check all
Image has been scaled down 25% (758x343). Click this bar to view original image (1010x456). Click image to open in new window.

and then go to create server tab
check use icon,delayed execution, and google chrome password
delayed execution will be the time taken for the server to inject into victim's pc .
google chrome password will help you to steal google chrome passwords.
a pop up will appear and just press ok
Image has been scaled down 25% (758x344). Click this bar to view original image (1008x457). Click image to open in new window.

now you have done setting up your server.
===================================================================
PortForwarding
Q: So, what is portforwarding?
A:Port forwarding allows remote computers, for example, computers on the Internet, to connect to a specific computer or service within a private local area network (LAN)
so lets start portforwarding.
remember that your the port that you have choosen is 100.
to make it easier.lets download the simpleportforward tool from this site:
SIMPLE PORT FORWARDING(click here)
from here pc wintech TuT starts ., all credits of port forwarding goes to Pc win tech.com
now, once it is downloaded,run the program.
1)firstly update your router list and set your router.
Image has been scaled down 38% (758x341). Click this bar to view original image (1216x547). Click image to open in new window.
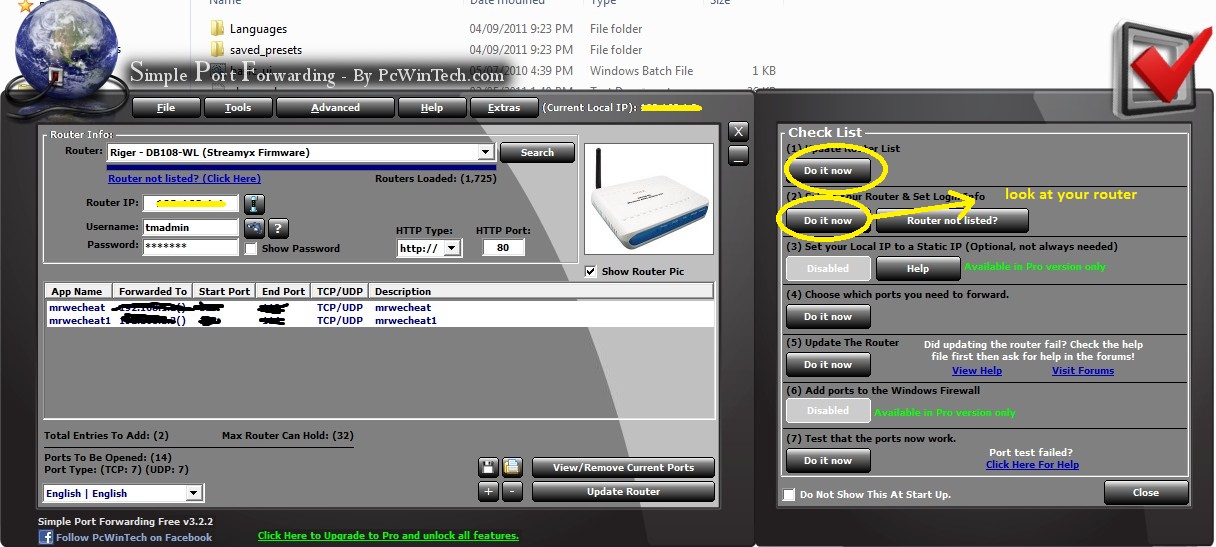
and press the "choose which port you need to forward" by pressing the "do it now"
and press the "add custom"
type
name:anything
type: tcp/udp
start port:99
end port:100
and then press "add"
now click "update router"

when you have pressed update router, you can see the program accessing your router and editing whatever you have typed just now.
and now the last step, which is to check whether your port 100 is open or not.
but before that close your cybergate program.
and now do like in the below picture
Image has been scaled down 9% (758x551). Click this bar to view original image (829x602). Click image to open in new window.
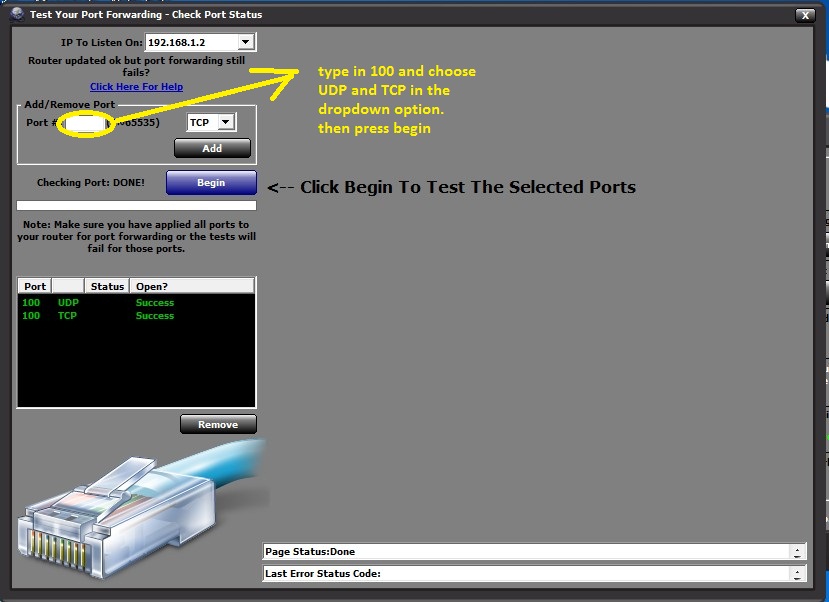
if the portforwarding is failed, then you have to start from the beginning of portforwarding
======================================================================
now,you have done it.
what you have to do now is spread your server.
good luck
R.A.T is remote administration tool. In other words, if a RAT is set up correctly, then a person (hacker) would gain acces on victim's computer. That hacker can do any stuff in victim's pc.
For example: a)will be able to move his mouse and keyboards
b)will be able to see your victim by hacking his webcam and etc.
2) Which is the best RAT?
I dont use many RATs. The best that i ever used is Cybergate RAT
So now, lets get started.
First of all you guys download this:
Cybergate Download Link(click here to download)
this download link was not made by me.download and use it at your own risk
this application is called cybergate and it will used to create rat server.
this app might be detected as virus by some antivirus.but dont worry it is not backdoored.
download it and extract it to a folder.
==============================================================
Secondly set up the no-ip client
to do that you must go to :
NO-IP SITE(click here)
register there.
once you have logged in, you must "add a host"
Image has been scaled down 36% (758x329). Click this bar to view original image (1174x509). Click image to open in new window.
Now type in your name at hostname.and choose any domain. you dont have to follow the same name like in the picture below.
now you can see that you have successfully created a host.
now download the no-ip duc client that is available at that site.
Image has been scaled down 16% (758x273). Click this bar to view original image (902x324). Click image to open in new window.
click the windows version.
once done downloading, run the program. sign in using your no-ip username and password.
and press select host and you can see your host there. click at the box and press save .
===========================================================
now its time to set up your cybergate RAT seRVER
LETS CONTINUE
run the cybergate rat that you have extracted into a folder.
there will be agreement which you got to wait for a few seconds before agreeing.
next: Control center-->start
now a box would appear.you have type in 100 and press the go image button.
and type in the connection password as 123456
and click save
Image has been scaled down 26% (758x344). Click this bar to view original image (1012x458). Click image to open in new window.
now press: control center--->builder--->create server
Image has been scaled down 25% (758x345). Click this bar to view original image (1009x459). Click image to open in new window.
now a box would appear.
click new
press the name of the new user and ok
Image has been scaled down 25% (758x344). Click this bar to view original image (1009x457). Click image to open in new window.
now double click the new user.
Image has been scaled down 25% (758x342). Click this bar to view original image (1009x455). Click image to open in new window.
after that you will the connection tab.
view the picture for better understanding.
if you want to test the server on yourself or same lan networkk, then you have to edit the 127.0.0.1:999 to 127.0.0.1:100
if you want to test on others, then add:
yourhost.no-ip.info:100
Image has been scaled down 25% (758x346). Click this bar to view original image (1010x460). Click image to open in new window.
change the identification to cyber and password to 123456
Image has been scaled down 26% (758x344). Click this bar to view original image (1011x458). Click image to open in new window.
now press the installation tab and use the same setting as mine.
Install directory is the where the server installs
%System%
%Windows%
%Root%
%Program Files%
%Other%
it is more better to use "system"
Boot: this will be the startup option. check everything and press random 5 times so that the server will start everytime your victim start the computer
Directory is the place where the server will be situated
File Name will be the name of the server in the directory
change the creation date
persistence will inject the server into the victim,s pc until success
for inject into just use default browser
dont choose hide file because it will make your server detectable by all antivirus
Image has been scaled down 25% (758x345). Click this bar to view original image (1008x458). Click image to open in new window.
go to anti debug tab and check all
Image has been scaled down 25% (758x343). Click this bar to view original image (1010x456). Click image to open in new window.
and then go to create server tab
check use icon,delayed execution, and google chrome password
delayed execution will be the time taken for the server to inject into victim's pc .
google chrome password will help you to steal google chrome passwords.
a pop up will appear and just press ok
Image has been scaled down 25% (758x344). Click this bar to view original image (1008x457). Click image to open in new window.
now you have done setting up your server.
===================================================================
PortForwarding
Q: So, what is portforwarding?
A:Port forwarding allows remote computers, for example, computers on the Internet, to connect to a specific computer or service within a private local area network (LAN)
so lets start portforwarding.
remember that your the port that you have choosen is 100.
to make it easier.lets download the simpleportforward tool from this site:
SIMPLE PORT FORWARDING(click here)
from here pc wintech TuT starts ., all credits of port forwarding goes to Pc win tech.com
now, once it is downloaded,run the program.
1)firstly update your router list and set your router.
Image has been scaled down 38% (758x341). Click this bar to view original image (1216x547). Click image to open in new window.
and press the "choose which port you need to forward" by pressing the "do it now"
and press the "add custom"
type
name:anything
type: tcp/udp
start port:99
end port:100
and then press "add"
now click "update router"
when you have pressed update router, you can see the program accessing your router and editing whatever you have typed just now.
and now the last step, which is to check whether your port 100 is open or not.
but before that close your cybergate program.
and now do like in the below picture
Image has been scaled down 9% (758x551). Click this bar to view original image (829x602). Click image to open in new window.
if the portforwarding is failed, then you have to start from the beginning of portforwarding
======================================================================
now,you have done it.
what you have to do now is spread your server.
good luck
---------------------------------------------------------knox
d3cryptor/Team 73cyf


 Posts


