
OpenVPN
This is an open source application. It provides ‘VIRTUAL PRIVATE NETWORK’. It provides tunneling in which we can transmit packets securely. The main aim of using any VPN is to secure the network. In my demonstration I am going to install, configure and test openvpn within server and client. I will also generate RDP through rdesktop utility. RDP will be forwarded via TLS tunnel. And as a proof we will also analyze the packet through tcpdump.
This is an open source application. It provides ‘VIRTUAL PRIVATE NETWORK’. It provides tunneling in which we can transmit packets securely. The main aim of using any VPN is to secure the network. In my demonstration I am going to install, configure and test openvpn within server and client. I will also generate RDP through rdesktop utility. RDP will be forwarded via TLS tunnel. And as a proof we will also analyze the packet through tcpdump.
Installation of openVPN
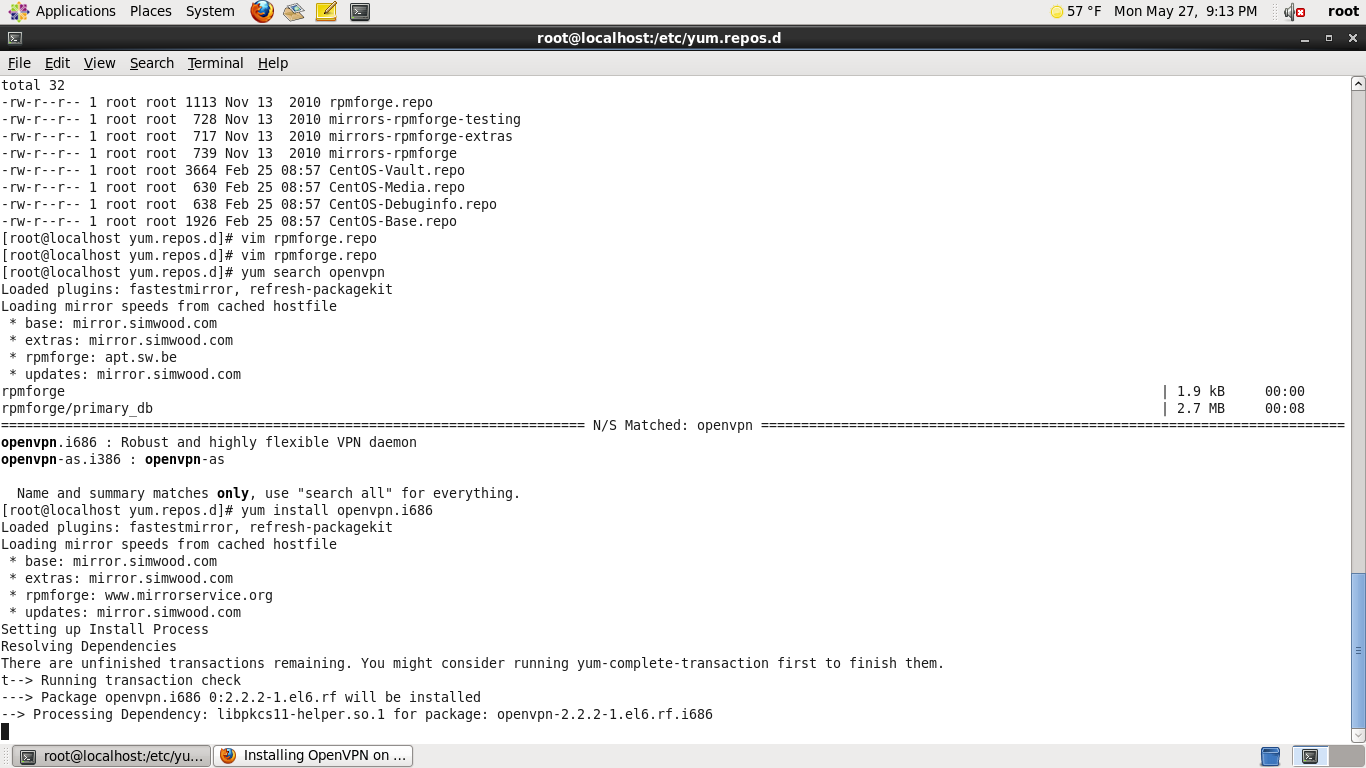
Here I will use two following commands to search openvpn package and installation Commands are as follows:
#yum search openvpn
#yum install -y openvpn.i686
Now we will copy easy-rsa folder to /etc/openvpn/ folder in order to generate certificates and keys.
Now we will make all files executable by changing the filer permission. Command is as follows:
#cd /etc/openvpn/easy-rsa/2.0
#chmod 755*
Building Certificate
Following command is used to generate certificate.
#./build-ca

Building Key
Above 4-5 fields are same as building certificate. The changes which are in key are mentioned as follows:

Computing DH ( Diffe-Hellman)
Now we will compute DH. DH stands for differ-hellman algorithm which is used for encryption process. This is the heart of the whole VPN configuration.

Creating server.conf
Now we will create a server.conf file in /etc/openvpn folder in which we will write commands as shown in figure:
Now we will create a server.conf file in /etc/openvpn folder in which we will write commands as shown in figure:

Now our openvpn service is ready to start but before that we need to disable SElinux and iptables so that they do not conflict with any of our configuration. To disable that, commands are as follows:
#service iptables stop
#service ip6tables stop
#SELINUX=disabled
Our server configuration part is finished here. Now we will move forward to client XP. Here in XP we will first install openvpn client by downloading and installing. It will create openvpn folder in program files. There will be a folder named config. We basically two things in this folder. One of the most important things is Certificate file which we created on server side. To copy that file form there to here we will use winscp utility. Usage is mentioned as follows:

As we open tool after installation it will ask for server IP address, username and password. Once authentication will be done we will be able to see two explorer windows XP and CentOS. Now we will go to location in Centos server and directly drag and drop ca.crt file to c:/program files/openvpn/config folder. Also from openvpn folder we will copy openvpn client and past into config folder. Then we will open that client in wordpad and will give following commands as follows:

Now we will create one user in windows XP. In my case I have created a user with my student id number which is 1224592. After this we will do right click on openvpn client and will start with option named “start openvpn on this config file”. After opening it for authentication. We will give our new username and password which we recently created.
One authentication is verified our openvpn connection will be established. To verify that we will give ipconfig command in another command prompt. It will give us vpn client ip address as follows:

It shows that our centos’s openvpn server is giving 10.10.49.6 ip address is to our XP client in which vpn establishment is done. We have already verified from command prompt by watching IP address but further more we will ping form our server and will wait for reply to cross verification of our configuration.
As it is mentioning in figure , this is the ip address of our encrypted openvpn logical interface.
As it is mentioning in figure , this is the ip address of our encrypted openvpn logical interface.

Connection establishment has been verified twice. Now we will verify the encryption. For that We will use tcpdump utility. Command which I used is as follows:
# tcpdump –nnttvXi eth0 host 192.168.41.132 and udp 1194
Here 1194 is the port which we have given while configuring our openVPN client.
So it clearly shows that every packet is encrypted.

Here our openvpn’s first task gets completed. Task was to configure or setup TLS which stands for transport layer security. Now we will move forward to RDP which is known as Remote Desktop Protocol.
Our RDP has to forward from our TLS tunnel. For that we need to configure remote desktop at our client side. We can do that by going My Computer -> Properties -> Remote Tab
Steps :
1. Click on Select Remote Users.

2. Click on Add.

3. Click on Find Now.

4. Select the user 1224592 which we created and click on OK.

5. Click on OK.

6. Click on OK.

Then click on Apply then OK. Once we finished this, we need to install any remote desktop utility in centos. rdesktop is the best utility for RDP. It will be installed by following command:
#yum install rdesktop
Once installation has been done, we will give following command to setup RDP via TLS. Make sure that we need to forward RDP through TLS so we need to give IP address of openvpn not Ipv4 of Windows XP machine. Command to connect to windows machine is as follows:
Once installation has been done, we will give following command to setup RDP via TLS. Make sure that we need to forward RDP through TLS so we need to give IP address of openvpn not Ipv4 of Windows XP machine. Command to connect to windows machine is as follows:
#rdesktop 10.80.49.6
Once you hit enter, one popup will come and it will ask us for authentication. After giving right credentials we will be able to operate windows XP machine through our centos server.
Once you hit enter, one popup will come and it will ask us for authentication. After giving right credentials we will be able to operate windows XP machine through our centos server.

Conclusion
Thus whole network configuration and administration task has been carried out. I faced many difficulties while configuration but I checked logs on regular basis. Usually I copy that error lying in log file and I was used to Google it. Luckily I was able to find solution all time. Thus whole task was carried away smoothly.
References


No comments:
Post a Comment